
In this arrangement of posts, I will walk you through the procedures of making an Active/Active SQL server bunch utilizing Hyper-V and Microsoft iSCSI target programming for virtualized SAN. The objective is to make initial a capacity server facilitated on an ordinary Windows 2008 R2 server. At that point associated with this server utilizing two different machines as iSCSI initiators. At that point, I will make the windows bunch alongside the DTC grouped administration. A bunched SQL server example will at that point be made. At last another grouped SQL server example will be made and Active/Active arrangement of the two occasions will be connected.
Solution Architecture
The solution is fairly simple as per the below configuration.

Preparation
First, You need to create three virtual machines for One as
the Active Directory with storage server and
Two as the SQL Nodes.
I created Active directory and two sql nodes joined to this
domain. You need additionally to setup two network cards in each machine to
work as typical LAN association and another for the cluster heartbeat. All
server will be static local IPs assigned on all network cards.
Virtualized SAN Steps
In this section, we need to create the virtual storage server based SAN.
Configuring the iSCSI Target
1- Download the required iSCSI target software from
2- Double click for installation.
3- After it completed it will take to a web page

4- Scroll down and click as below image

5-


6- Open server manager and find a new tree as below


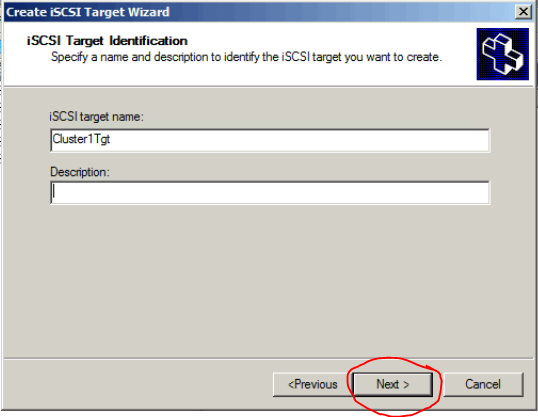
7- Give new name (Just any name)
8- Now just click advanced and enter all the domain names that will have access to this target. In our case this is UK-LIT-DB1 and UK-LIT-DB2.


9- Then Click finish. you have completed the creation of your iSCSI target and what remains is to add the required virtual disks to it.

10- Create new VHD and give it a name.

11- Give Disk size

12- Click next than Click finish and this would create the fixed size disk.
13- You need to create the following disks so just follow the same approach

Configuring the iSCSI Initiators
Now we will configure the two SQL nodes:
1- First Log on to the first node UK-LIT-SQL1
2- Open the iSCSI initiator

3- Then Change the initiator name to match the machine name

4- Click In the discovery tab add a new discovery portal using the IP of the storage server.
5- Click on the targets tab and click refresh to show the available targets in the list.

6- Then you need to Click connect then OK.

7- Then Go to the volumes and devices tab and click auto configure

8- Do the follow same steps on UK-LIT-SQL2

9- Then Go to any node SQL and open the server manager and then the disk management.
10- Then Bring all disks online to this node and then prepare them with primary partitions and format those using NTFS.
In the next parts I will show you how to configure SQL cluster. Stay with us :D

No comments:
Post a Comment
We love comments from you which appreciate us to be on the way of Technology.